Arduino Sensor
Arduino is a simple and easy-to-use development board which is perfect for hobbyists like me. As a small project using the Arduino Uno, I wanted to make a small device that can read temperature, humidity, and light intensity so that I can get a more accurate result than the weather report or a particular area.
The Layout
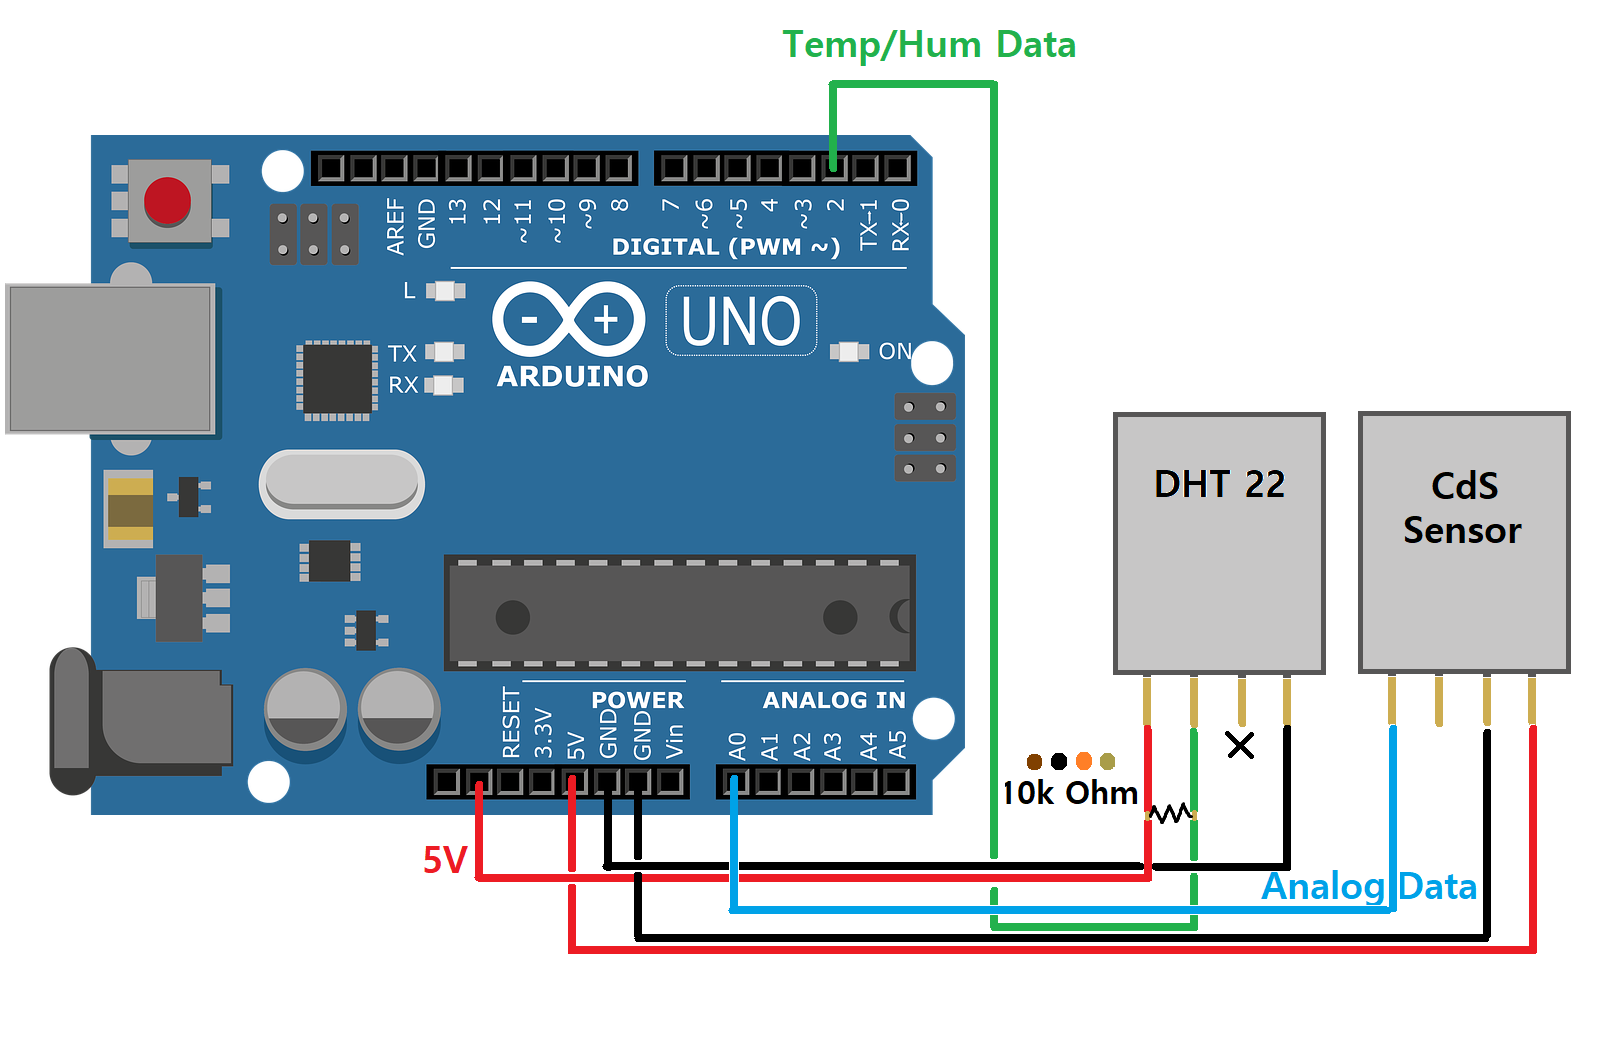
DHT22
DHT22 is a basic, low-cost digital temperature and humidity sensor. If you are implementing this at home, do not forget the resistor connecting between power and data.
CdS Sensor
CdS sensors are used to measure the intensity of light. For the particular sensor that I am using (SZH-SSBH-011), it supports both digital and analog outputs. For analog outputs, the bigger the value, the darker the environment.
The code
In order to use the temp/hum sensor (DHT22), we need a library called DHT. There are several ways to add the library:
- Using the builtin Library Manager Tool
- Manually downloading the library from Github
The first method is very simple. On the Arduino IDE go to
Sketch>Include Library>Manage Libraries...
It usually takes a few seconds to open up the manager. Once the library manager is up, search for DHT using the search bar on the top. The one I used is made by Adafruit which is an open-source hardware company that makes a lot of sensors and libraries (which are open source and available on Github!). Once you click on install, you will also need to install the dependencies for safe measure.
The second method requires a bit more work. As I mentioned before, the library is open source by Adafruit, so it has to be downloaded from the repository. After downloading the library, go back to the Arduino IDE to include the library (in .ZIP). In addition, you will have to manually download the libraries for the dependencies also.
Actual Code
Now that the required library is installed, let’s go into the code used for the tasks.
#include <DHT.h>

#define BIT_PER_SEC 9600
#define DHT_TYPE    DHT22 // AM2302
#define DHT_PIN     2     // PWM for temperature/humidity
#define SUN_AO_PIN  0     // for sunlight analog output
#define SUN_POINT   500   // point between day and night
#define M_TIME      2000  // seconds between each measurement

// initialize DHT sensor
DHT dht(DHT_PIN, DHT_TYPE);

void setup() {

  Serial.begin(BIT_PER_SEC);
  dht.begin();
}

void loop() {

  delay(M_TIME);
  // reading temp|hum takes about 250 millisec thus putting a delay
  float humidity = dht.readHumidity();
  float temp = dht.readTemperature();

  // validate the read values for hum/temp
  if (isnan(humidity) || isnan(temp)) {
    Serial.println("Failed to read temperature and humidity");

    // set the values as inadequate so the interpreter will know
    humidity = -1;
    temp = -100;
  }

  // reading sunlight intensity (bigger the value the darker)
  int sunlight = analogRead(SUN_AO_PIN);

  Serial.print("Humidity: ");
  Serial.print(humidity);
  Serial.print(" %  |  Temperature: ");
  Serial.print(temp);
  Serial.print(" *C  |  Light: ");
  Serial.println(sunlight);
}
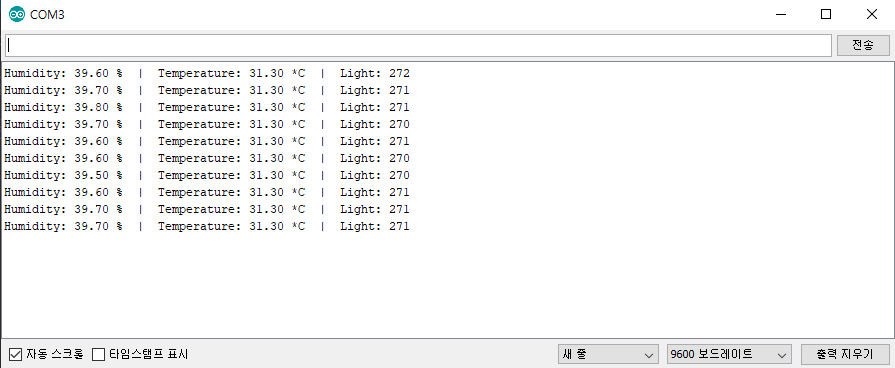
The code is really simple as it just reads from the sensors every 250 ms and print the values.
The printed values can be checked using the Serial Monitor > Tool > Serial Monitor
Result:
Future Plans
As I mentioned in the beginning, I plan to use this to measure the local area using this device. However, to actually read the value, I would have to physically be near the area which would be inconvenient. So, as a solution, I plan to add a radio transmitter and receiver.
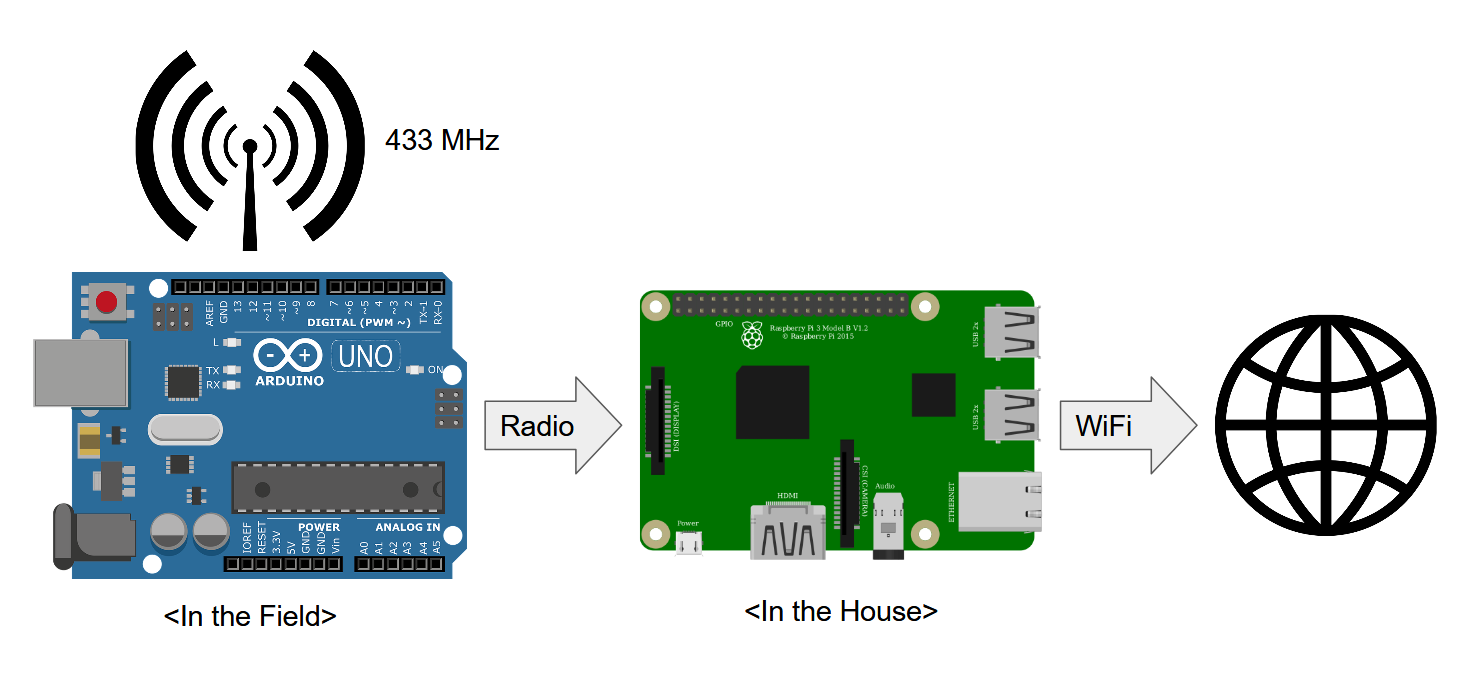
The transmitter on the Arduino will send unique messages (like http packets) with the data and the raspberry pi will receive it and interpret the messages. After the values are interpretted, the raspberry pi will update its log and the updated information will be visible via internet. With this solution, I will be able to view the climate from home.