N7D - Linux Device Driver
Beginning my journey into embedded systems, I wanted to know how to make device drivers for Linux. I started with the Linux Device Drivers 3rd edition (available on LWN.net). Although the book is a little outdated, I highly recommend reading it as it has useful information about the concepts of the kernel, and various kernel level APIs & subsystems that are still used today.
To get the most up-to-date information, there are various resources such as the official Linux documentation, Linux source code cross referencer Elixir, KernelNewbies, LWN.net blog posts, eLinux, and even the Linux mailing list.
Back to the project, as a beginner’s project, I decided to create a simple display driver for the 4-digit 7-segment display. The hardwares used are as follows (from right to left):
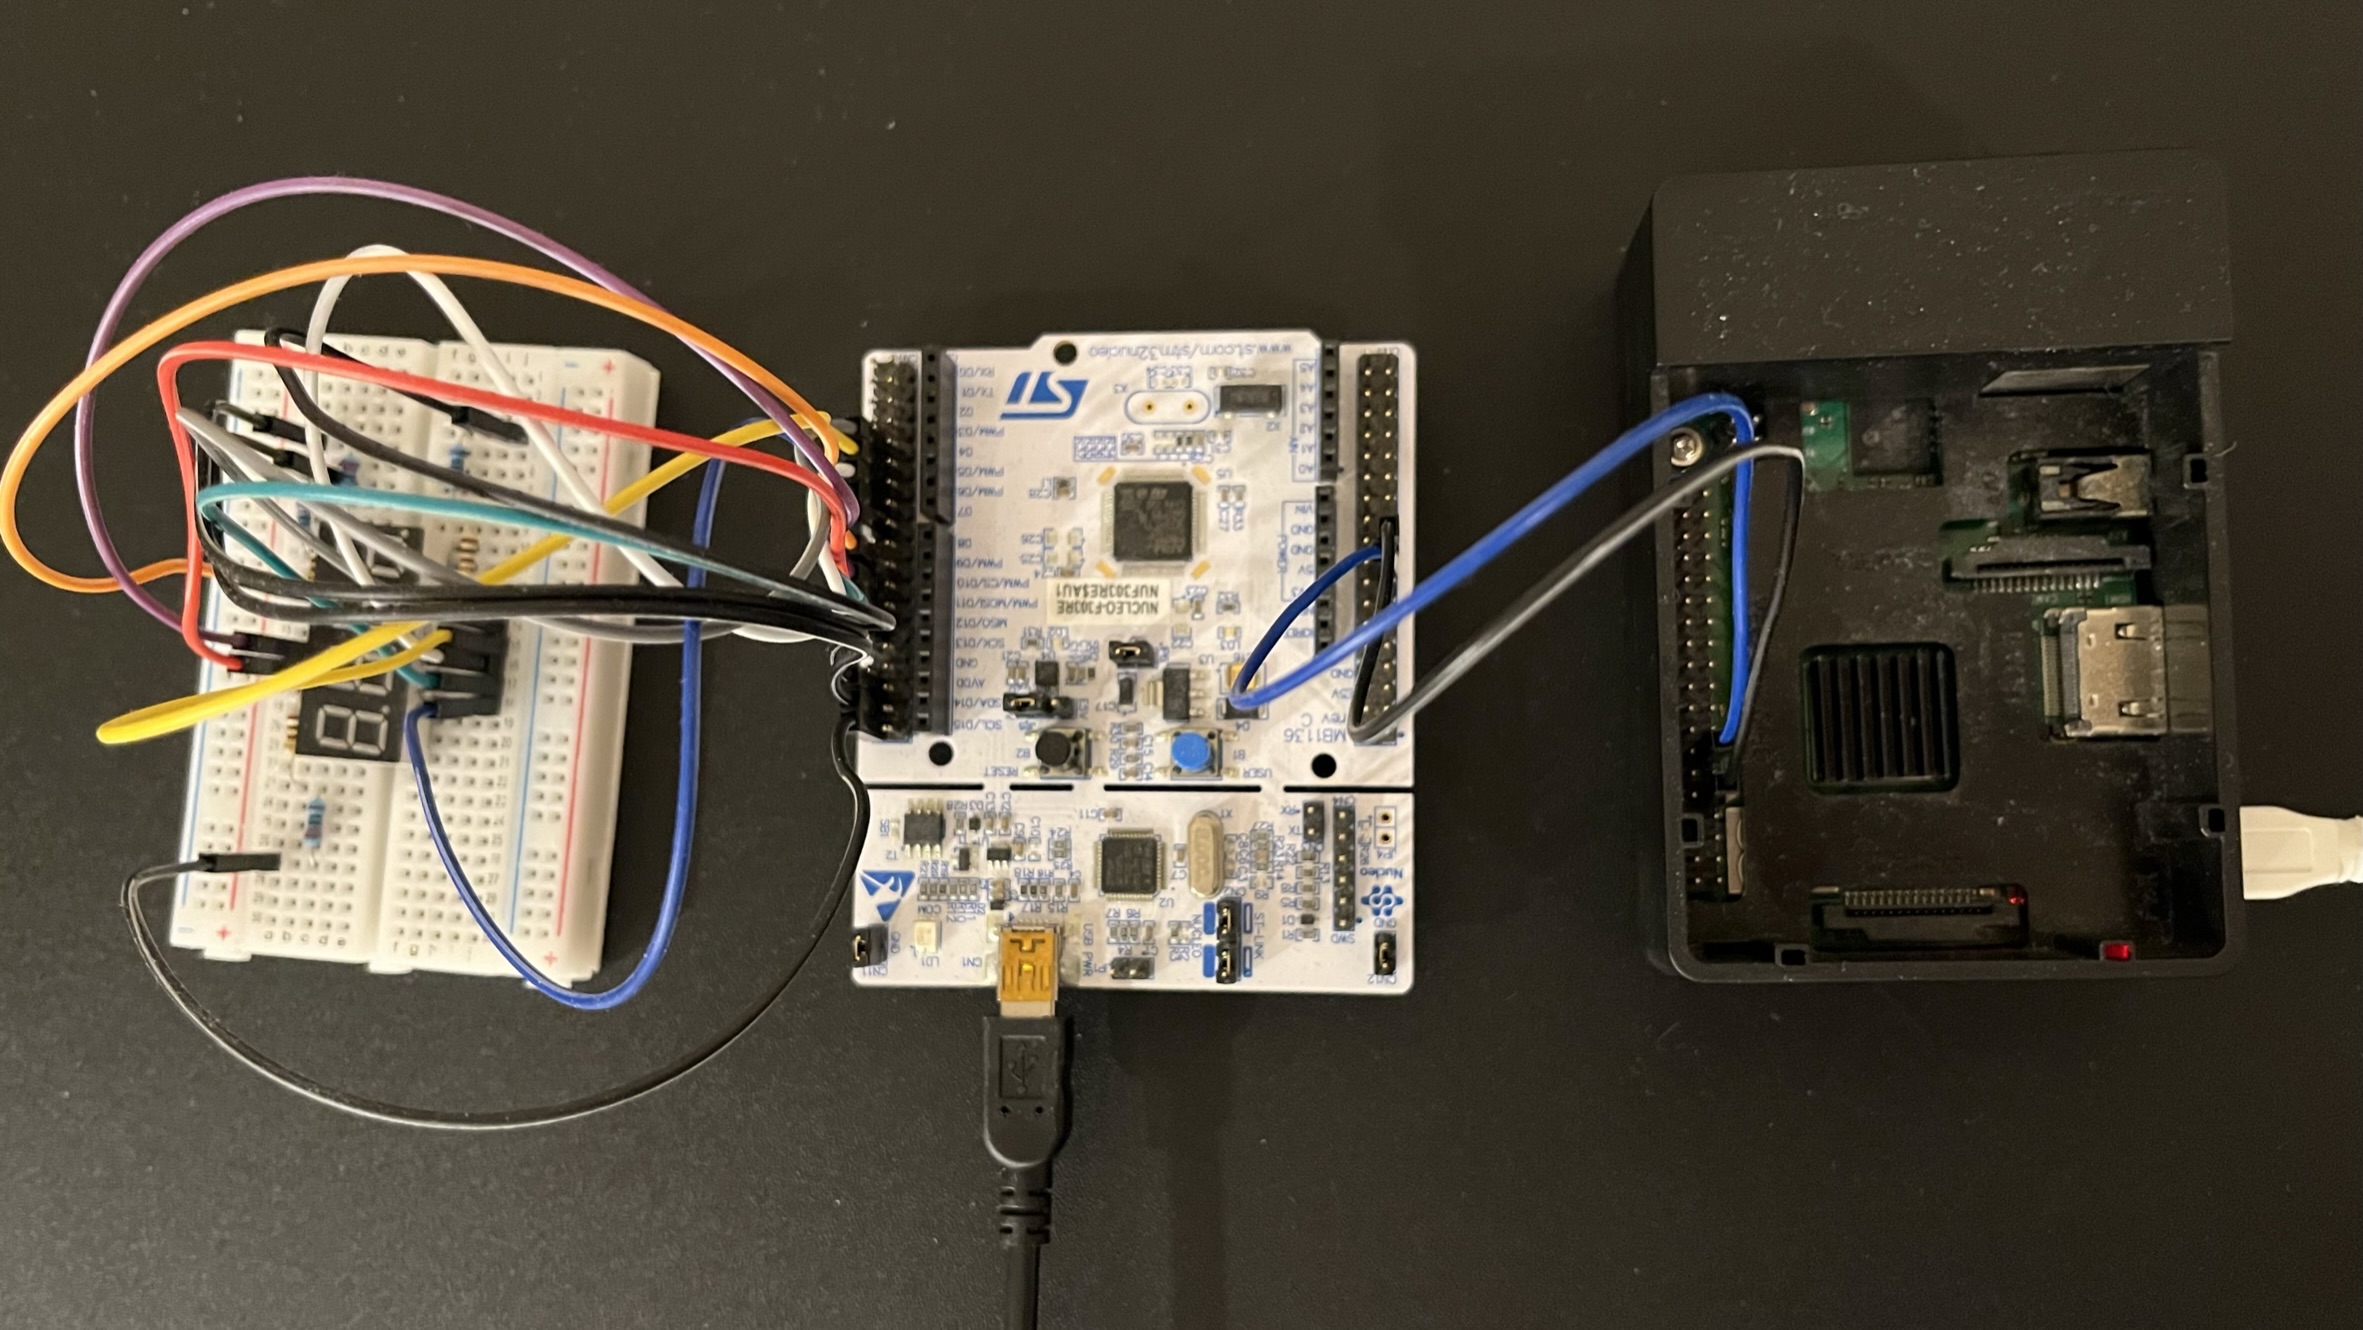
- Raspberry Pi 3B+ running Raspbian
- STM Nucleo-F303RE
- 3461AS-1 (7-segment display)
On the Pi, the device driver is divided into two parts: upper half and lower half.
The upper half is responsible for user interaction.
Through the misc device (/dev/n7d), the user-space application can do file operations such as open, write, and close on the the device since Linux treats everything as a file.
These file operations are how the user can interact with the device through the kernel.
For instance, the user can use the write operation to send numbers to the display. When the user calls the write system call, the passed arguments are checked and the bytes are queued on the circular buffer of the device driver data. Since there can be multiple applications writing to the display at the same time, the write function uses mutex to avoid race conditions. In addition, there are asynchronous and synchronous modes of operation since the operation may block if the circular buffer is full. Once the byte is added to the circular buffer, the lower half can consume it to send the bits to the other end. The driver data is what connects the upper half and the lower half.
The lower half has a workqueue which is a neat kernel API to handle work asynchronously. The workqueue has work that repeatedly self-queues itself to the workqueue and puts the next byte from the circular buffer to another field in the device driver’s data. This byte is then accessed by the kernel timer’s callback function. The timer used here is a high resolution timer (or hrtimer) which is set to the baudrate of the serial communication. For example, if the baudrate is 38400 bps, the interval should be around 26,042 (= 1,000,000 / 38,400) nanoseconds. So, in every 26,042 nanoseconds, a bit will be sent.
First, it will send the start bit. By sending, it’s setting the appropriate logic level on the GPIO pin specified in the device tree for an interval time. The device tree, in simple terms, is the data structure used by some architectures/computers to describe the hardware available on-board. There is a great introductory video on YouTube that I recommend watching to get a gist of it. A device tree overlay is used to let the device driver to know which pins or configurations to use. Once the GPIO pin is specified, the device driver can use the GPIO subsystem to set the necessary GPIO pin as 1 or 0. Once the start bit is sent, the 8 data bits are sent with the least-significant-bit first at every interval. Once all the data bits have been sent, a stop bit is set to indicate end of transmission. Through bit banging, there is flexibility added as any GPIO pin can be used to send data.
When the Nucleo board receives the byte, it handles displaying to the 7-segment display. Since the code is very simple, I will not discuss further here. Instead, here is a demo video.
In retrospect, through this project, I was mostly impressed with how mature Linux was. It had various APIs available to use with tons of resources online. However, there was also the problem of having outdated resources still remaining online. In those cases, using the cross referencer and checking out the comments in the source code of the kernel was extremely helpful. In the early stages of development, when implementing the upper half of the device driver, I used a virtual machine to test out since I didn’t want to brick my one and only laptop. A post about how to use it can be found here. Overall, I think it could have been written more simple and robust, but it was a good learning experience.